Integrate new tools in GPS (2)
by Emmanuel Briot –
Customizing build target switches
In the first post in this series (Integrate new tools in GPS) we saw how to create new build targets in GPS to spawn external tools via a menu or toolbar button, and then display the output of that tool in its own console, as well as show error messages in the Locations view.
The customization left to the user is however limited in this first version. If the build target's Launch Mode was set to Manual With Dialog, a dialog is displayed when the menu or button is selected. This dialog lets users edit the command line just before the target is executed.

The next time that the dialog is open, it will have the modified command line by default.
This is however not very user friendly, since the user has to remember all the valid switches for the tool. For the standard tools, GPS provides nicer dialogs with one widget for each valid switch, so let's do that for our own tool.
Whenever we edit targets interactively in GPS, via the /Build/Settings/Targets menu, GPS saves the modified build target in a local file, which takes precedence over the predefined targets and those defined in plug-ins. This ensure that your modifications will always apply, but has the drawback that any change in the original target is not visible to the user.
So let's remove the local copy that GPS might have made of our build target. The simplest, for now, is to remove the file
- Windows: %USER_PROFILE%\.gps\targets.xml
- Linux and Mac: ~/.gps/targets.xml
Describing the switches
We now have to describe what are the valid switches for our tool.
For a given tool (for instance my_style_checker), we could have multiple build targets. For instance:
- one that is run manually by the user via a toolbar button
- and another build target with a slightly different command line that is run every time the user saves a file.
To avoid duplication, GPS introduces the notion of a target model. This is very similar to a build target, but includes information that is shared by all related build targets. We will therefore modify the plugin we wrote in the first part to move some information to the target model, and in addition add a whole section describing the valid switches.
import GPS
GPS.parse_xml("""
    <target-model name="my_style_checker_model">
        <description>Basis for all targets that spawn my_style_checker</description>
        <iconname>gps-custom-build-symbolic</iconname>
        <switches command="my_style_checker" columns="2" lines="1">
           <title column="1" line="1">Styles</title>
           <check label="Extended checks"
                  switch="--extended"
                  tip="Enable more advanced checks"
                  column="1" line="1" />
           <check label="Experimental checks"
                  switch="--experimental"
                  column="1" line="1" />
           <combo switch="--style" separator="=" noswitch="gnat">
              <combo-entry label="GNAT" value="gnat" />
              <combo-entry label="Style 1" value="style1" />
              <combo-entry label="Style 2" value="style2" />
           </combo>

           <title column="2" line="1">Processing</title>
           <spin label="Multiprocessing"
                 switch="-j"
                 min="0"  max="100"  default="1"
                 column="2" line="1" />
        </switches>
    </target-model>

    <target model="my_style_checker_model"
            category="File"
            name="My Style Checker">
        <in-toolbar>TRUE</in-toolbar>
        <in-menu>TRUE</in-menu>
        <launch-mode>MANUALLY_WITH_DIALOG</launch-mode>
        <command-line>
           <arg>my_style_checker</arg>
           <arg>%F</arg>
        </command-line>
        <output-parsers>
           output_chopper
           utf_converter
           location_parser
           console_writer
           end_of_build
        </output-parsers>
    </target>
""")
Let's go over the details.
- on line 3, we create our target model. To avoid confusion, we give it a name different from that of the build target itself. This name will be visible in the /Build/Settings/Targets dialog, when users interactively create new targets.
- on line 6, we describe the set of switches that we want to make configurable graphically. The switches will be organized into two columns, each of which contains one group of switches (a "line" in the XML, for historical reasons).
- on line 7, we add a title at the top of the left column (column "1").
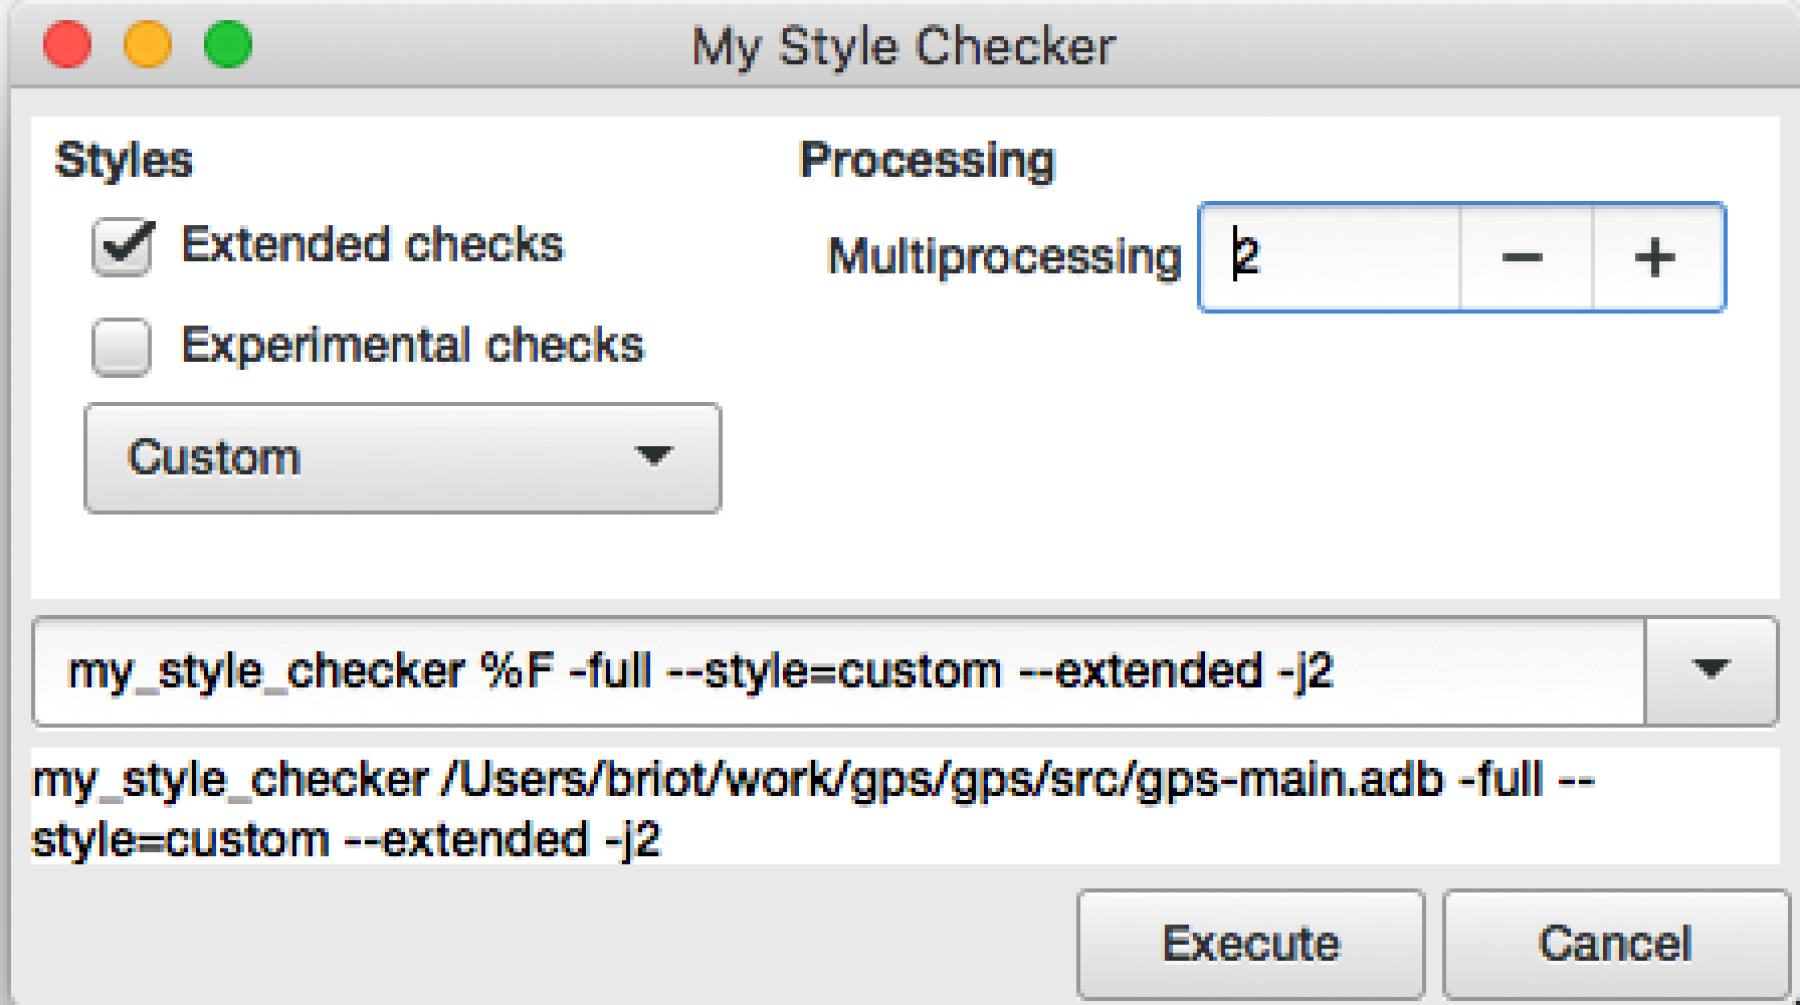
- on line 8 and 12, we add two check boxes. When they are selected, the corresponding switch is added to the command line. On the screenshot below, you can see that "Extended checks" is enabled, and thus the "--extended" switch has been added. These two switches are also in column "1".
- on line 15, we add a combo box, which is a way to let users choose one option among many. When no switch is given on the command line, this is the equivalent of "--switch=gnat". We need to specify that an extra equal sign needs to be set between the switch and its value.
- on line 22, we add a spin box, as a way to select a numerical value. No switch on the command line is the equivalent of "-j1".
- on line 29, we alter the definition of our build target by referencing our newly created target model, instead of the previous "execute", and then remove duplicate information which is already available in the model.
At this point, when the user executes the build target via the toolbar button, we see the following dialog that let's users modify the command line more conveniently.

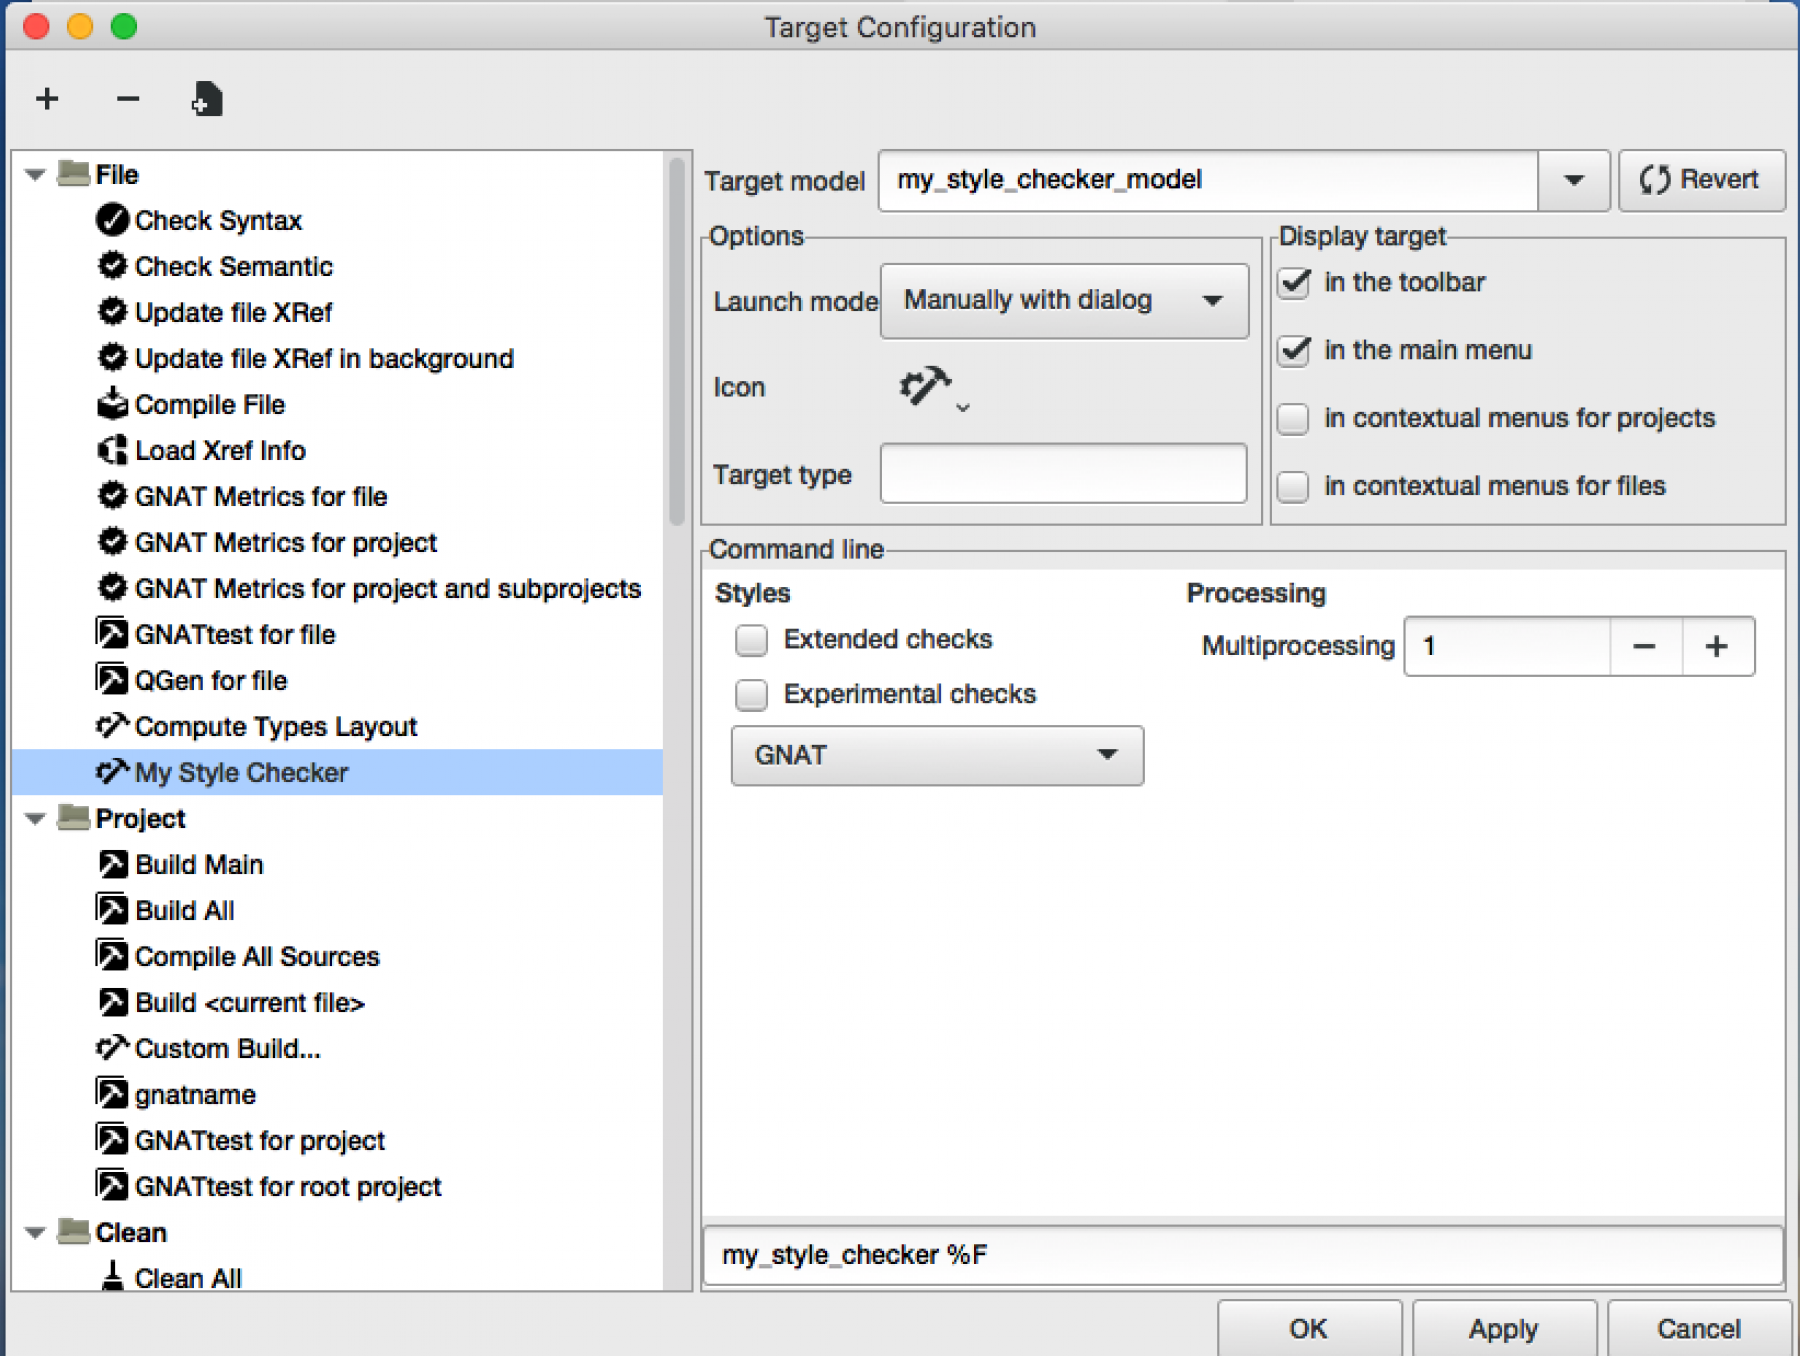
The same switches are visible in the /Build/Settings/Targets dialog

Conclusion
In this post, we saw how to further integrate our tool in GPS, by letting users set the command line switches interactively.
We have now reached the limits of what is doable via just build targets. Later posts will extend the plugin with python code, to add support for preferences and custom menus. We will also see how to chain multiple actions via workflows (save all files, compile all code, then run the style checker for instance).
