Integrate new tools in GPS
by Emmanuel Briot –
Integrate external tools in GPS
The GNAT Programming Studio is a very flexible platform. Its goal is to provide a graphical user interface (GUI) on top of existing command line tools. Out of the box, it integrates support for compilers (via makefiles or gprbuild) for various languages (Ada, C, C++, SPARK, Python,...), verification tools (like codepeer), coverage analysis for gcov and gnatcoverage, version control systems (git, subversion,...), models (via QGEN) and more.
But it can't possibly integrate all the tools you are using daily.
This blog describes how such tools can be integrated in GPS, from basic integration to more advanced python based plugins. It is the first in a series that will get your started in writing plug-ins for GPS.
Basic integration: build targets
Every time GPS spawns an external tool, it does this through what is called
a Build Target. They can be edited via the /Build/Settings/Targets menu (see also the online documentation)
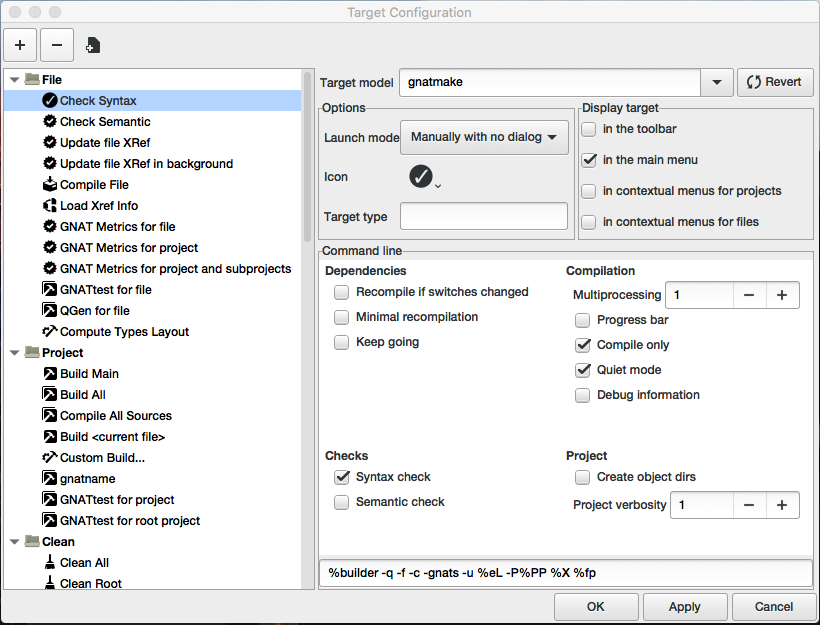
On the left of the dialog, you will see a list of all existing build targets,
organized into categories. Clicking on any of these shows, in the right panel,
the command line used to execute that target, including the name of the tool,
the switches,...
The top of the right panel describes how this build targets integrates in GPS. For instance, the Display Target section tells GPS whether to add a button to the main toolbar, or an entry in the /Build menu or perhaps in some of the contextual menus.
Selecting any of the resulting toolbar buttons or menus will either execute the action directly, no question asked (if the Launch Mode is set to "Manually with no dialog"), or display a dialog to let users modify the switches for that one specific run (if the Launch Mode is set to "Manually with Dialog"). It is even possible to execute that build target every time the user saves a file, which is useful if you want to run some kind of checks.
Creating a new target
To create a new build target, click on the [+] button on the left. This pops up a small dialog asking for the name of the target (as displayed in GPS), a target model (which presets a number of things for the target -- I recommed using "execute -- Run an executable" as a starting point), and finally the category in which the target is displayed.
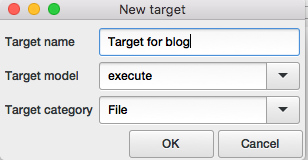
Click on [OK].
In the right panel, you can then edit the command line to run, where the target should be displayed, and how it is run.
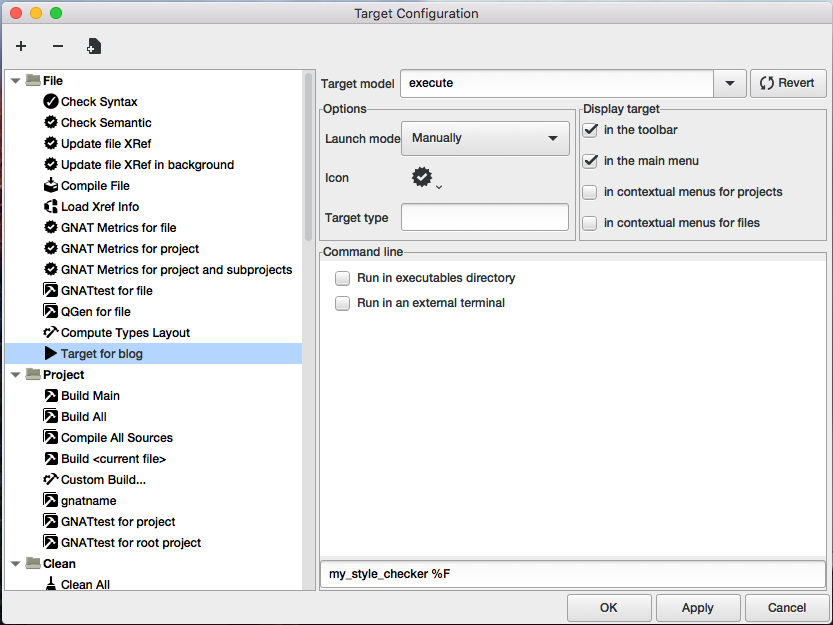
The command line supports a number of macros, like %F, that will be replaced with information from the current context when the target is run. For instance, using "%F" will insert the full path name for the current file. Hover the mouse on the command line field to see all other existing macros.
Press [OK] when you are done modifying all the settings.
(On some versions of GPS, you need to restart GPS before you can execute the build target, or macro expansion will not be done properly)

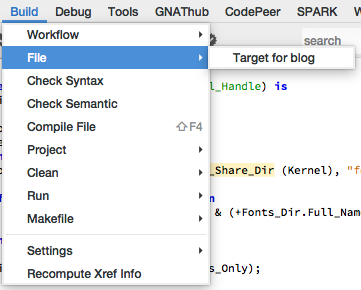
Running the target
When you select either the toolbar button or the menu, GPS will open a new console and show the output of your tool. In this example, we have created a simple program that outputs a dummy error on the first line of the file passed in argument.
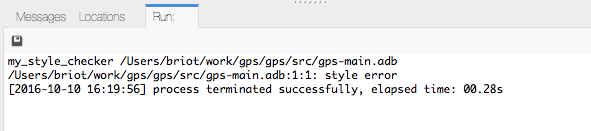
Advanced integration via target models
As you saw in the previous screenshot, the result of running our custom command is that its output is sent to a new window named "Run". But nothing is clickable. In our example, we would like users to be able to click on the location and have GPS display the source location.
This is no doable just via the GUI, so we'll need to write a small plugin. Let's remove the target we created earlier, by once again opening the /Build/Settings/Targets dialog, selecting our new target, and clicking on [-].
Let's then create a new file
- Windows: %USER_PROFILE%\.gps\plug-ins\custom_target.py
- Linux and Mac: ~/.gps/plug-ins/custom_target.py
The initial contents of this file is:
import GPS
GPS.parse_xml("""
    <target model="execute" category="File" name="My Style Checker">
        <in-toolbar>TRUE</in-toolbar>
        <in-menu>TRUE</in-menu>
        <launch-mode>MANUALLY</launch-mode>
        <iconname>gps-custom-build-symbolic</iconname>
        <command-line>
            <arg>my_style_checker</arg>
            <arg>%F</arg>
        </command-line>
        <output-parsers>
           output_chopper
           utf_converter
           location_parser
           console_writer
           end_of_build
        </output-parsers>
   </target>
 """)
This file is very similar to what the GUI dialog we used in the first part did (the GUI created a file ~/.gps/targets.xml or %USER_PROFILE%\.gps\targets.xml). See the online documentation.
One major difference though is the list of output parsers on line 12. They tell GPS what should be done with whatever the tool outputs. In our case:
- we make sure that the output is not split in the middle of lines (via "output_chopper");
- we convert the output to UTF-8 (via "utf_converter");
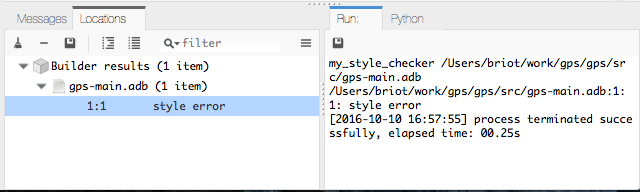
- more importantly for us, we then ask GPS, with "location_parser" to detect error messages and create entries in the Locations view for them, so that users can click them;
- we also want to see the full output of the tool in its own console ("console_writer");
- Finally, we let GPS performs various cleanups with "end_of_build". Do not forget this last one, since it is also responsible for expanding the %F macro.
The full list of predefined output parsers can be found in the online documentation.
If we then restart GPS and execute our build target, we now get two consoles showing the output of the tool, as happens for compilers for instance.
Conclusion
With the little plugin we wrote, our tool is now much better integrated in GPS. We have
- menus to spawn the tool, with arguments that depend on the current context
- display the tool's output in a new console
- make error messages clickable by the user to show the proper sources
In later posts, we will show how to make this more configurable, via custom GPS menus and preferences. We will also explain what workflows are and how they can be used to chain multiple commands.
About Emmanuel Briot

Emmanuel Briot has been with AdaCore between 1998 and 2017. He has been involved in a variety of projects, in particular oriented towards graphical user interfaces, including GtkAda, GPS, XML/Ada, GnatTracker and our internal CRM. He holds an engineering degree from the Ecole Nationale des Telecommunications (Brest, France).