GNATprove Tips and Tricks: User Profiles
by Yannick Moy –
One of the most difficult tasks when using proof techniques is to interact with provers, in particular to progressively increase proof power until everything that should be proved is proved. The naive solution that consists in setting from the start the proof power to a maximum is not satisfying, as you may end up waiting hours just because of an error in the code or missing contract that makes the desired property unprovable. A better strategy is to start with a low proof power, in order to get results fast, and then increase proof power selectively on those parts of the code with unproved properties (using the features to run GNATprove on a single file/subprogram/line inside GPS or GNATbench).
Until the last release, increasing the proof power meant operating on three separate switches:
- increasing the timeout given to the prover for proving a single formula (a Verification Condition) with --timeout
- using other provers (in particular among Alt-Ergo, CVC4 and Z3 that are distributed with GNATprove now) with --prover
- changing the generation of formulas, so as to present the prover with simpler ones (but a larger number of them) with --proof
Although we described a suggested workflow for progressively augmenting the proof power with these switches in the section of the SPARK User's Guide on investigating prover shortcomings, it was not so easy in particular for new users. To better support them, we have created a switch --level going from 0 to 4 that sets the previous switches in order to increase proof power from 0 to 4. You can see the exact mapping in the SPARK User's Guide.
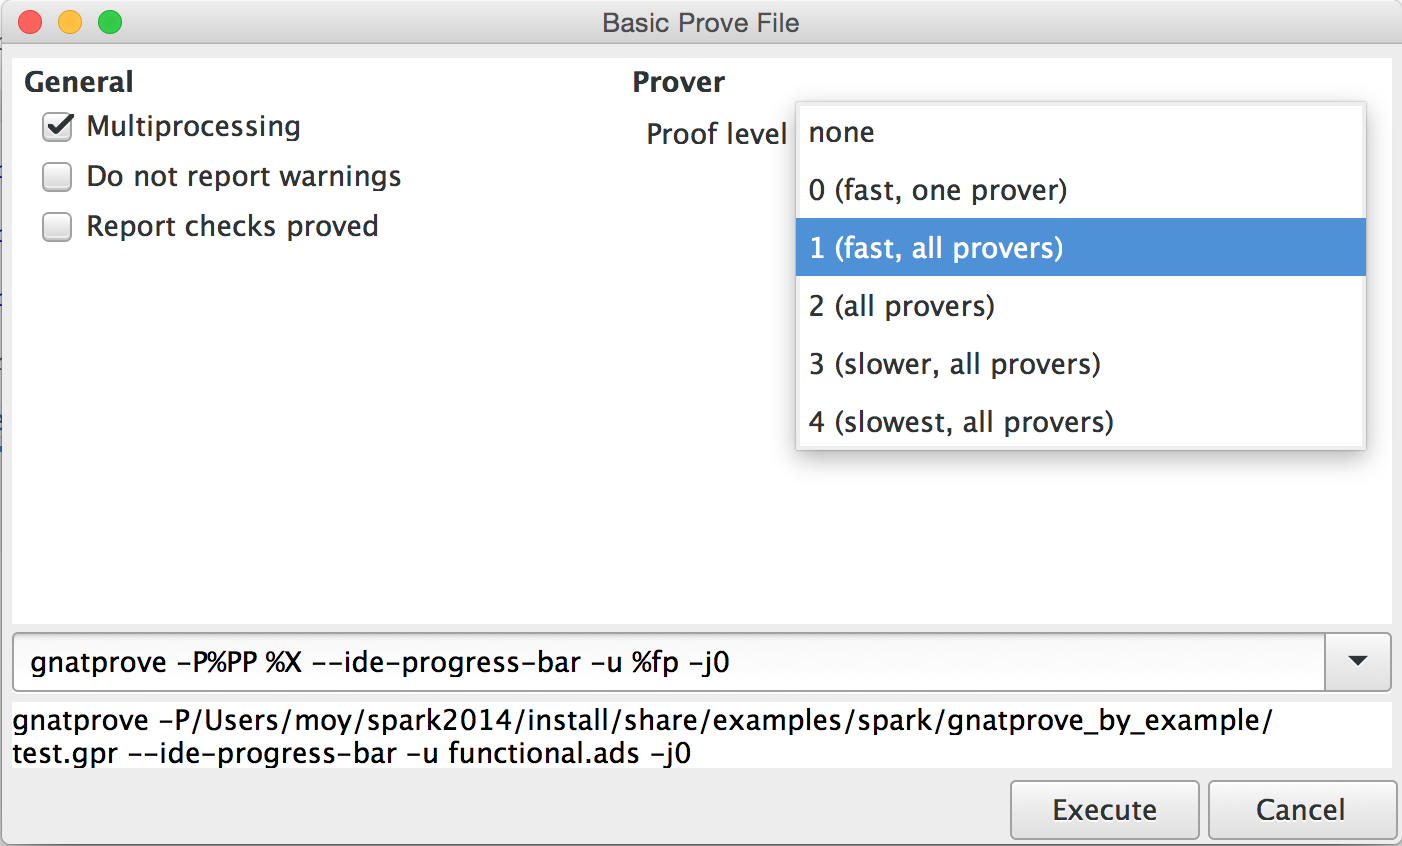
That's usable on the command line, but also from GPS, as the default panel shown to a user when doing a proof activity is now much simplified, based on the new --level switch:
The previous panel is now available by changing the preference 'User profile' in Edit→Preferences→SPARK to 'Advanced':

With this profile, the panel shown to a user when doing a proof activity is more extensive, allowing to set underlying switches. For example, here is how one can set the switches which correspond to level 1 like done above:
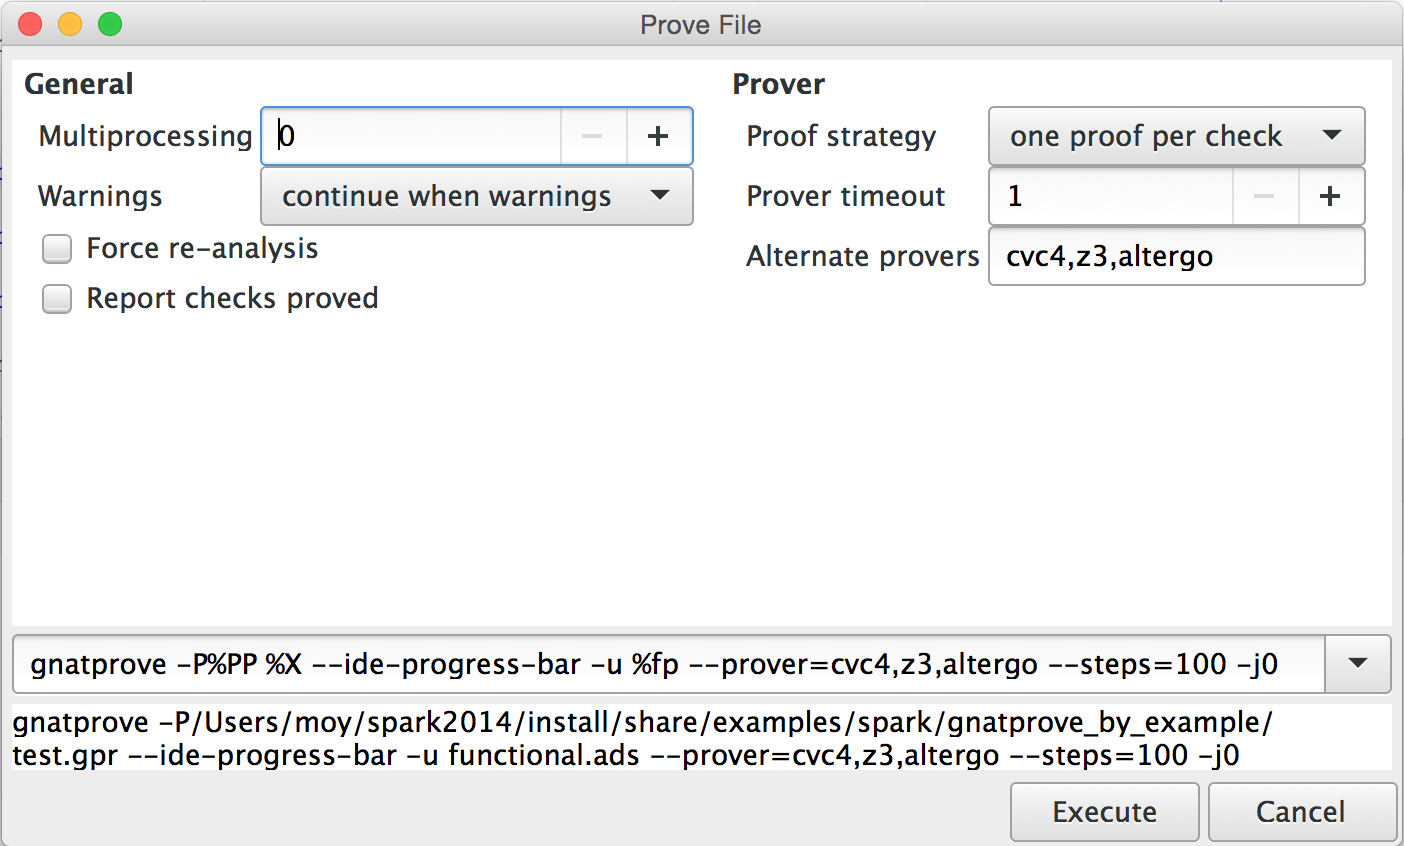
Note that switches may also be set on the test line on the bottom of the panel. That's what I did for example to set switch --steps in the last panel, since it has no dedicated element in the panel.
About Yannick Moy

Yannick Moy is Head of the Static Analysis Unit at AdaCore. Yannick contributes to the development of SPARK, a software source code analyzer aiming at verifying safety/security properties of programs. He frequently talks about SPARK in articles, conferences, classes and blogs (in particular blog.adacore.com). Yannick previously worked on source code analyzers for PolySpace (now The MathWorks) and at Université Paris-Sud.