Ada GameDev Part 2: Making 2D maps with Tiled
by Fabien Chouteau –
In part one of this series we saw how the GESTE library brings 8-bit era graphics rendering to modern microcontrollers. In this second post we will see how to create your game maps and export them to a format that is compatible with GESTE.
The journey begins with graphic assets. To create our levels we need a tileset (see part one). Of course you can draw your own tileset with a drawing program like gimp or photoshop, but if (like me) you are not a great artist, the best way is to use assets from opengameart.org. For this post I will use the “EverCrazy 8x8 Tile Palette” by EverCrazy.
Next we need a tool to design the levels. We are going to use an open source map editor Tiled (https://www.mapeditor.org/).
This is not going to be a tutorial on how to use Tiled, but we will go through the basic steps.
Make a tileset in Tiled
The first step when starting a Tiled project is to create a tileset. Click on File -> New -> New Tileset…
A dialog box will open:
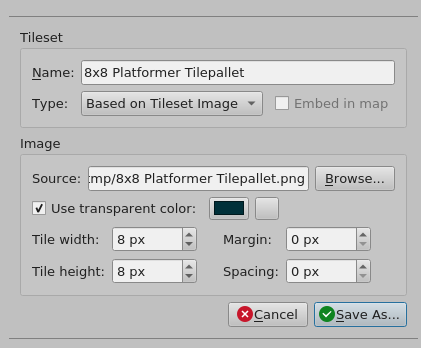
Click on “Browse...” to select the tileset picture downloaded from opengameart.org. The important parameters are:
The transparent color. You can click on the colored box to select in the image what the transparent color is.
Tile width and height. Here we have 8x8 pixel tiles
Click on “Save As...” to create a “.tsx” file that contains the tileset information.
Now you should have the tileset available in Tiled:

You can have more than one tileset in Tiled and use them in your maps.
Make a map in Tiled
Now that we have a tileset we can create a map. Click on File -> New -> New map…
A dialog box will open:
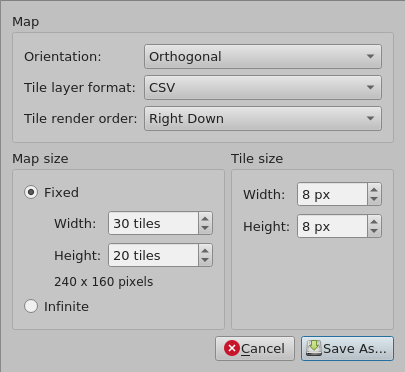
The parameters:
Orientation
Tile layer format
Tile render order
should not be changed. Otherwise the map will not be compatible with GESTE.
The tile size should be 8x8 pixel as this is what our tileset uses. The map size doesn’t matter much, it can be changed later if need be.
Click on “Save As...” to create a “.tmx” file that contains the map information.
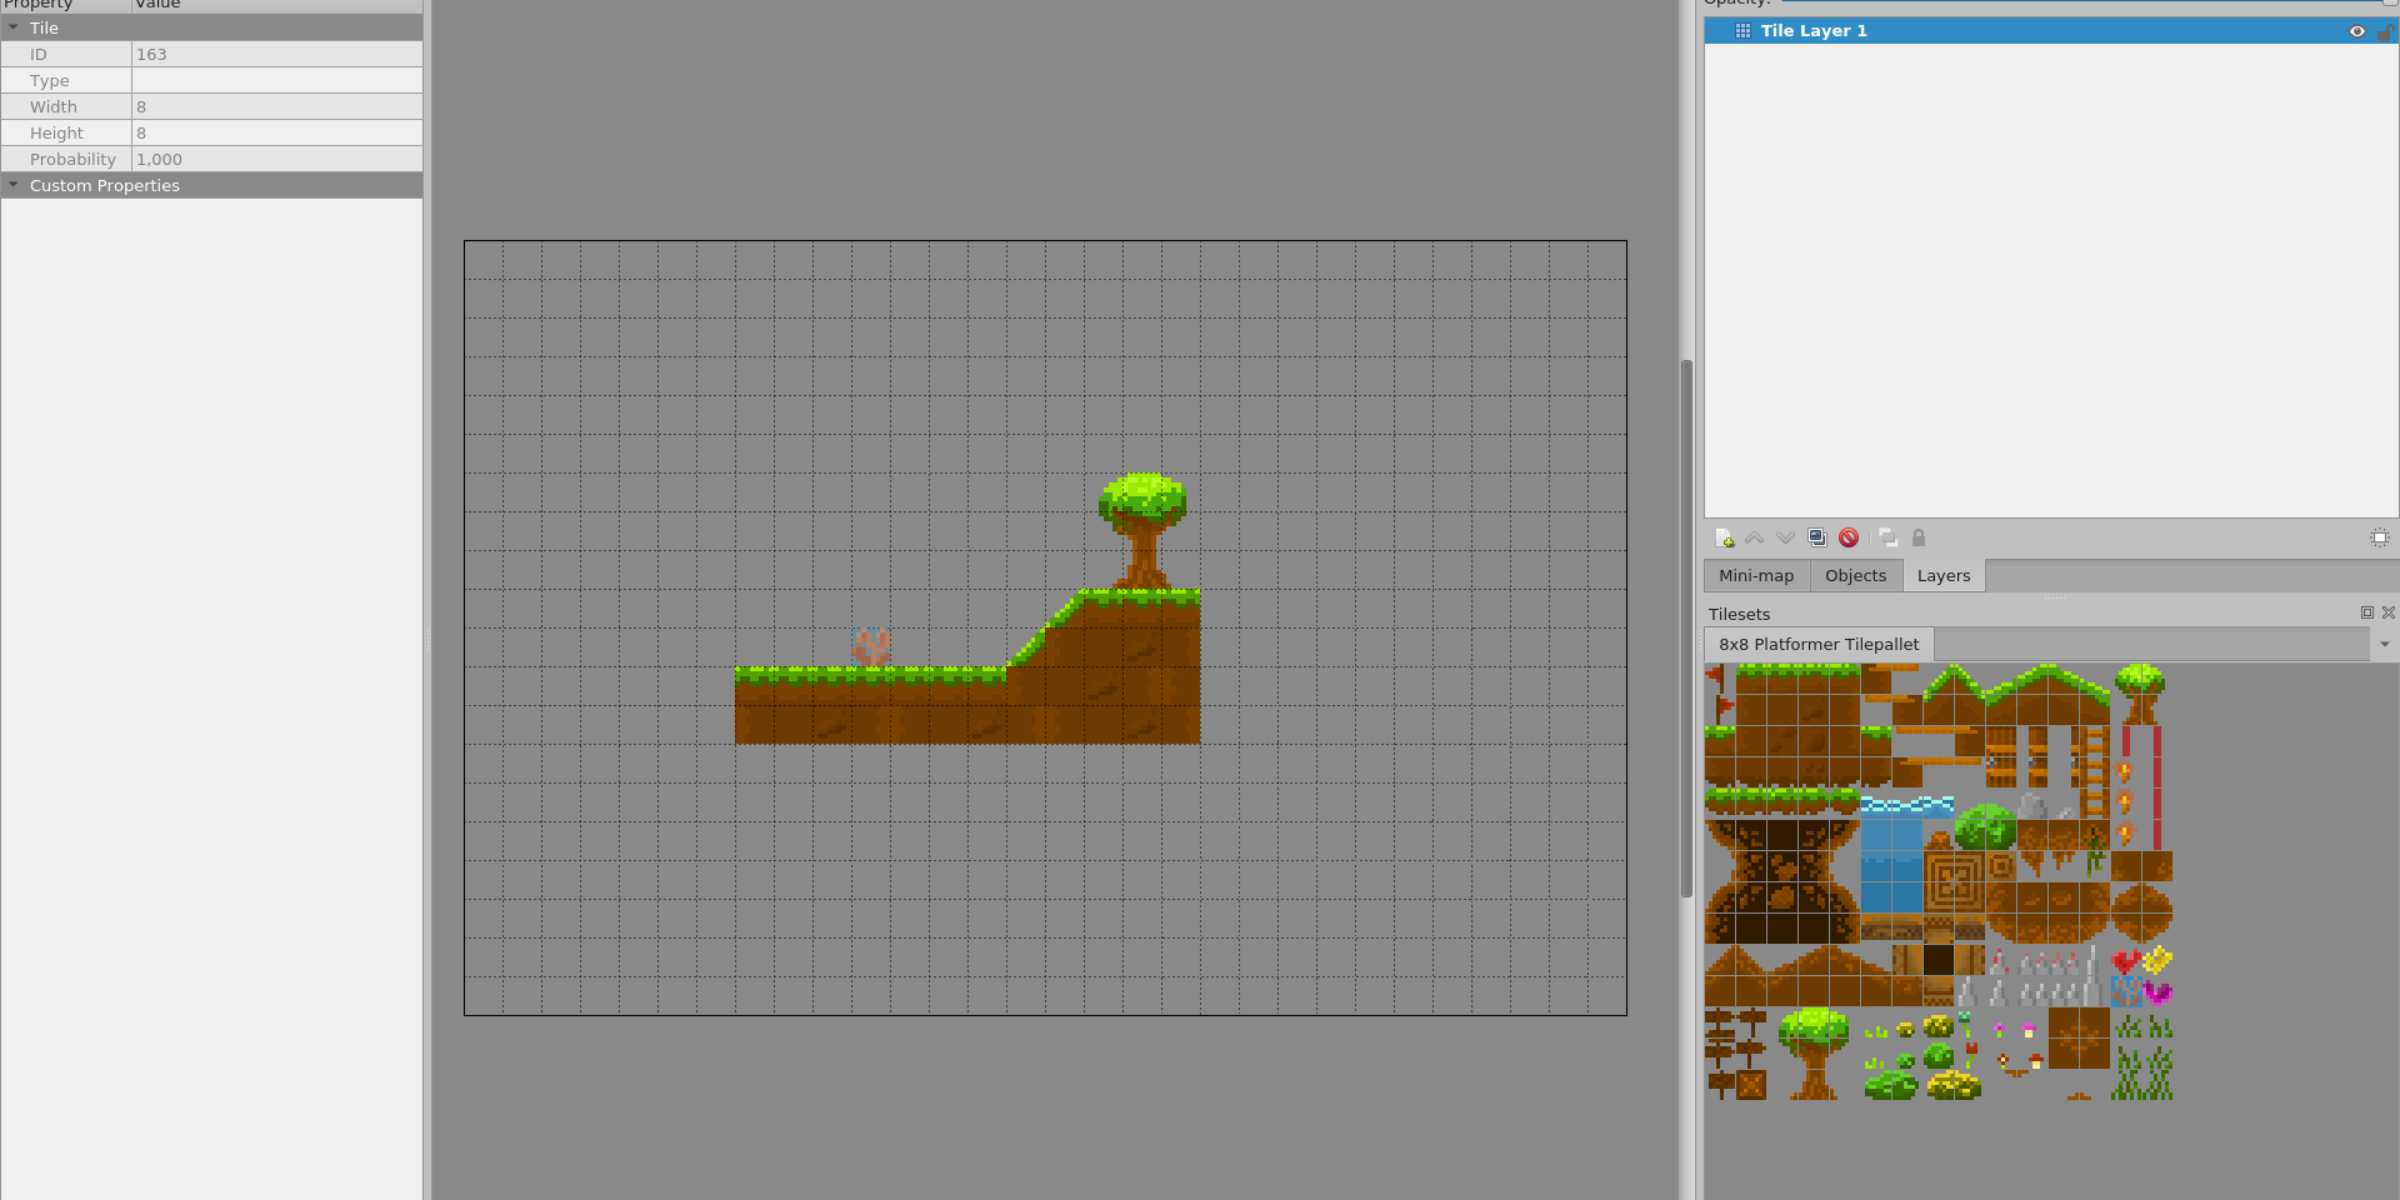
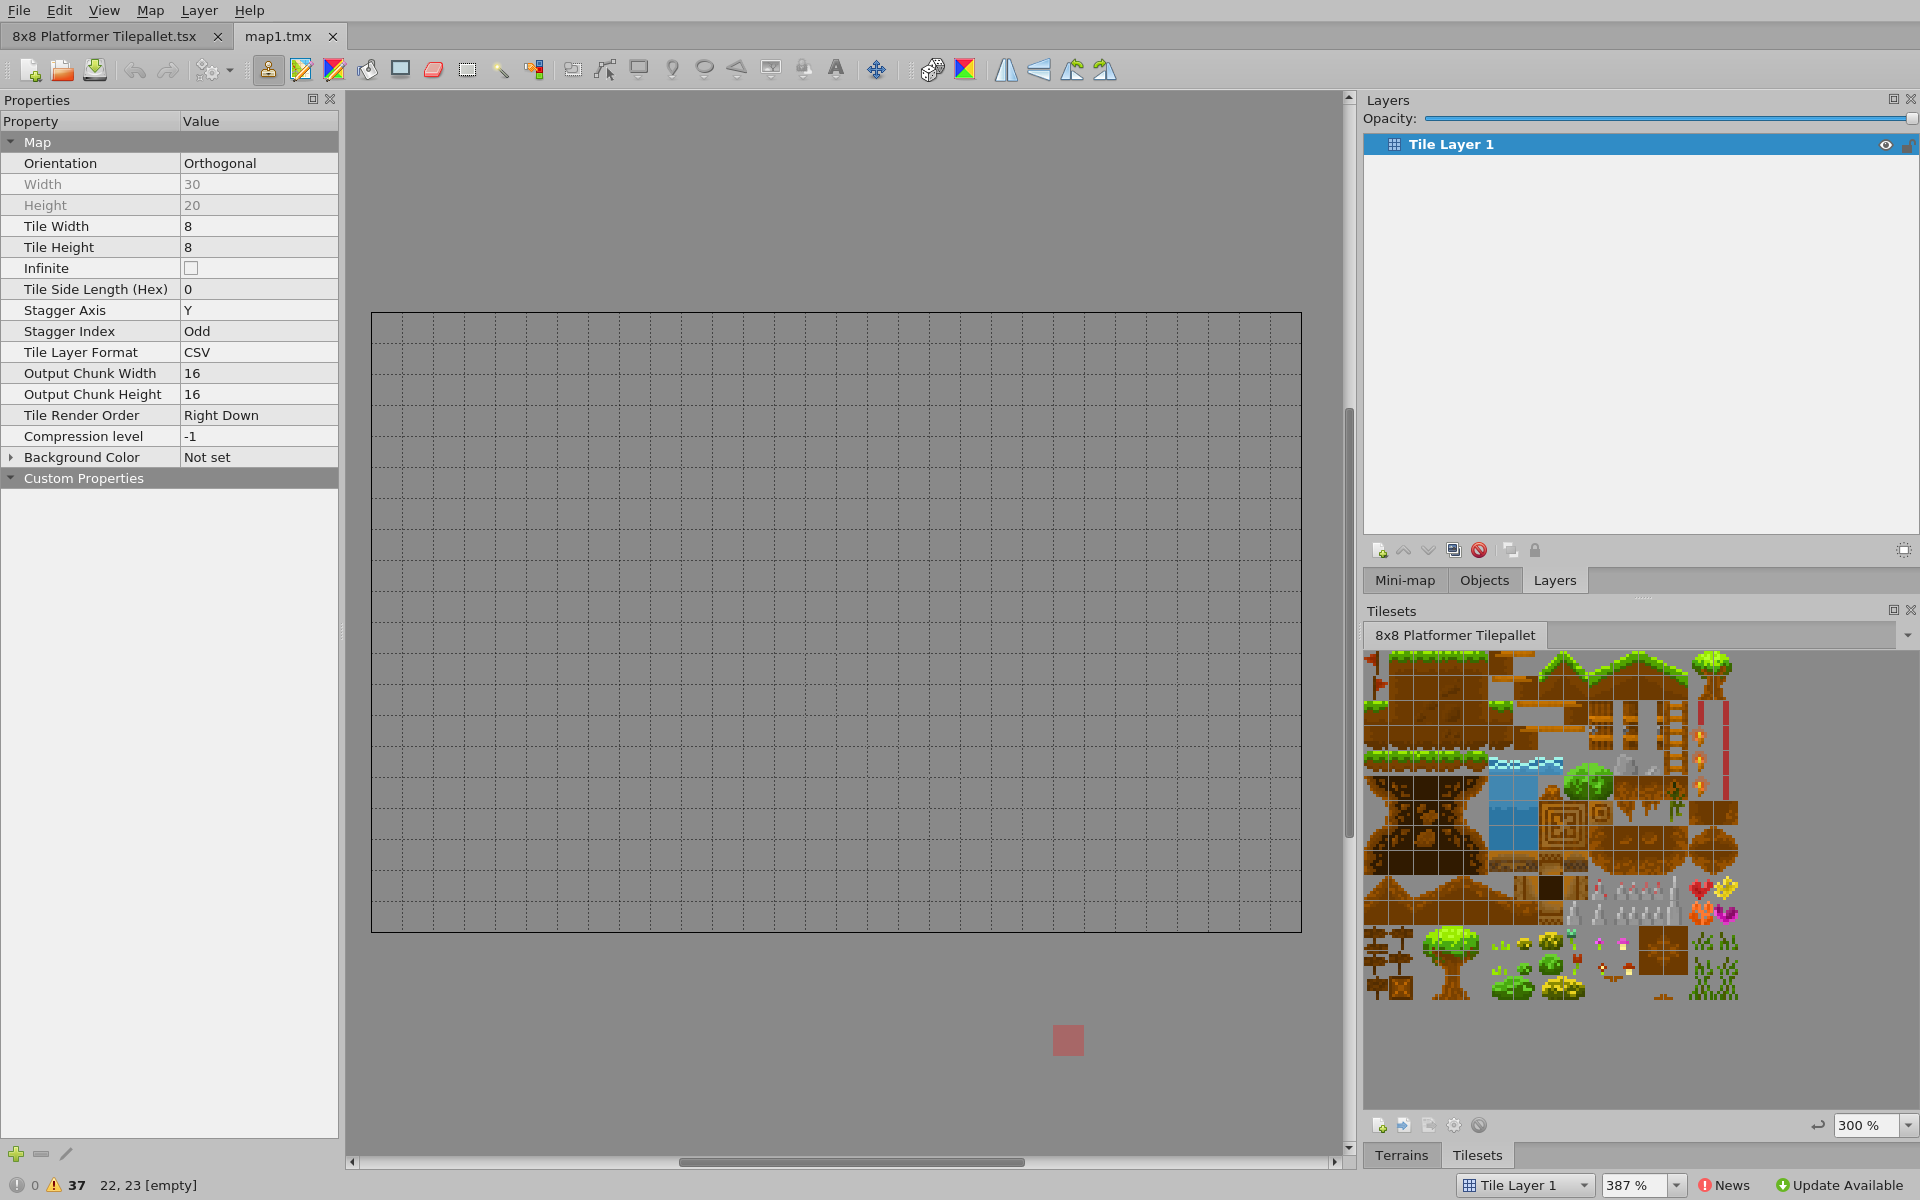
Now you should have a map drawing window with the map grid in the middle and tileset at the bottom right.
From there you just have to select a tile in the tileset and click in the map grid to place it. And that’s how you create your maps:

Generate code for GESTE
Now that we have a map and tileset from Tiled, the next step is to convert them to a format compatible with GESTE.
I developed a command line tool that takes Tiled files (.tmx, .tsx) and generates GESTE data inside Ada packages. The tool is called “tiled_code_gen” and is available in the Alire package manager.
tiled_code_gen reads maps and tilesets from Tiled and creates both a common color palette and a common tileset. So only the colors and tiles actually used in your maps are in the generated output. This will optimize memory usage, which is often a scarce resource on microcontrollers.
Here’s what the command line looks like:
$ tiled_code_gen -f RGB565_Swap --geste --root-package-name=game_assets *.tmx-f: defines the output pixel format. Here we use a 16-bit RGB that is byte swapped for compatibility with the screen of the PyGamer board.
--geste: enables the GESTE output in the form of Ada packages
--root-package-name=game_assets: defines the name of the root package for the generated Ada code
*.tmx: the Tiled map(s)
The output will contain:
geste_config.ads: a package specification that provides constants for GESTE configuration (e.g. tile size, number of tiles, color format)
game_assets.ads: a package specification that contains the color palette
game_assets-tileset.ads: a package specification that contains the tileset
game_assets-*.ads: one package specification for each Tiled map that contains the map data
If you want a more complete example, have a look at the assets from my game “Shoot'n Loot”. The Tiled files are here and the corresponding generated code here.
Conclusion
Combined, GESTE and tiled_code_gen make game asset development a breeze.
I will try to cover in a follow-up post the extra features of tiled_code_gen that I did not cover here, for example the handling of tile collision boxes.
In the meantime you can try to modify “Shoot'n Loot” levels or even add new levels; contributions are welcome.
About Fabien Chouteau

Fabien joined AdaCore in 2010 after his engineering degree at the EPITA (Paris). He is involved in real-time, embedded and hardware simulation technology. Maker/DIYer in his spare time, his projects include electronics, music and woodworking.