Ada for micro:bit Part 2: Push buttons
by Fabien Chouteau –
Welcome to the Ada for micro:bit series where we look at simple examples to learn how to program the BBC micro:bit with Ada.
If you haven't already, please follow the instructions in Part 1 to setup your development environment.
In this second part we will see how to use the two buttons of the micro:bit.
Interface
To know if a button is pressed or not, we will use the function State of the MicroBit.Buttons package.
type Button_State is (Pressed, Released);

type Button_Id is (Button_A, Button_B);

function State (Button : Button_Id) return Button_State;
Arguments:
- Button : The Id of the button that we want to check. There are two Ids:
Button_AorButton_B.
Return value:
- The function
Statereturn theButton_Statethat can be eitherPressedorReleased.
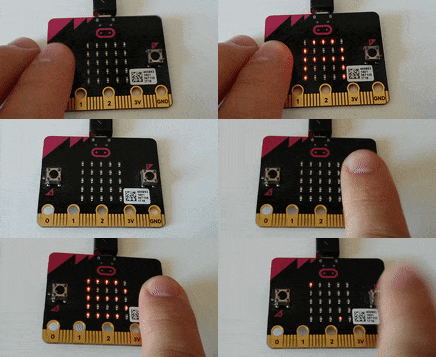
We will use this function to display the letter A if the button A is pressed, or the letter B if the button is pressed.
Here is the full code of the example:
with MicroBit.Display;
with MicroBit.Buttons; use MicroBit.Buttons;
with MicroBit.Time;

procedure Main is
begin

   loop
      MicroBit.Display.Clear;

      if MicroBit.Buttons.State (Button_A) = Pressed then
         --  If button A is pressed

         --  Display the letter A
         MicroBit.Display.Display ('A');

      elsif MicroBit.Buttons.State (Button_B) = Pressed then
         --  If button B is pressed

         --  Display the letter B
         MicroBit.Display.Display ('B');
      end if;

      MicroBit.Time.Delay_Ms (200);
   end loop;
end Main;
Following the instructions of Part 1 you can open this example (Ada_Drivers_Library-master\examples\MicroBit\buttons.gpr), compile and program it on your micro:bit.

See you next week for another Ada project on the micro:bit.

Don't miss out on the opportunity to use Ada in action by taking part in the fifth annual Make with Ada competition! We're calling on developers across the globe to build cool embedded applications using the Ada and SPARK programming languages and are offering over $9,000 in total prizes. Find out more and register today!
