Building a GNAT SAS analysis pipeline on GitLab
by Léo Germond –
In this series of blog posts, we’ll implement a GNAT SAS analysis pipeline for Ada code on GitLab. The goal of such a pipeline is to detect defects in the code as early as possible, a task which can be difficult considering the following:
Static code analysis is a challenging task, and the difficulty scales up with code size
Typically, an exhaustive static analysis run requires dedicated hardware and a sizeable amount of server time
Static analyses rarely ever detect defects with 100% certainty, so they additionally require manual reviews to deal with false positives
Typical CI-based workflows don’t include static analysis as a “first-class” citizen, the way they do e.g. testing (Test-Driven Development, continuous testing)
Git uses a branch-oriented approach to version control, so the static analysis needs to be managed over several branches/forks of a project, as easily as possible
Thankfully, GNAT SAS 24 can easily be integrated into GitLab, and it is even possible to make it scale nicely.
In this first post, we will focus on getting a pipeline that "Just Works(tm)", leaving aside the more advanced scalability issues, improvements of the user experience, or maintainability issues.
Introduction
To follow this blog post you should already be familiar with both GNAT SAS and the GitLab CI pipelines from a user’s perspective.
We are using GNAT SAS 24, the latest version with a new feature set that eases integration with CI workflows. One could adapt the code contained in this post to support an earlier version of the tool, but this is not straightforward and is left as an exercise for the reader.
In case you are not familiar with GitLab’s CI, I recommend that you read https://docs.gitlab.com/ee/ci/pipelines/ for an overview of the features and terminology.
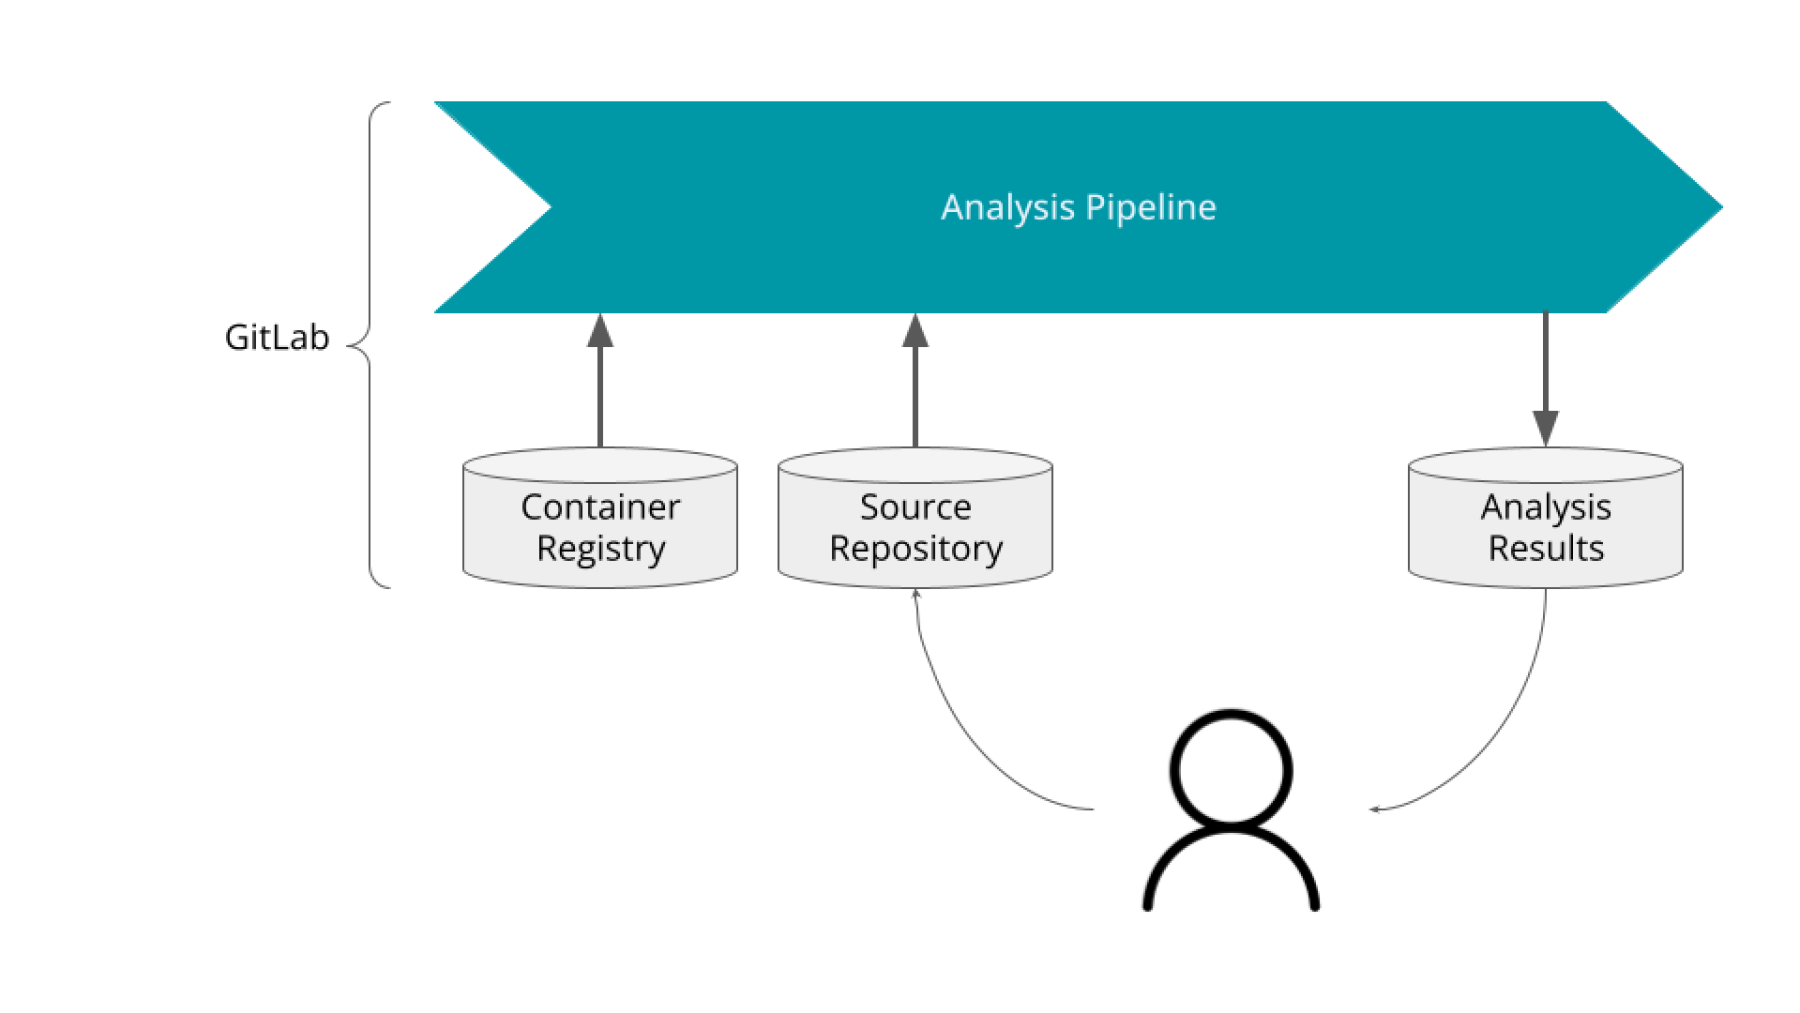
See Figure 1, which shows a simple diagram of a code analysis pipeline

This pipeline contains the bare minimum we need as a user to get an analysis running on our machine through GitLab. The container registry contains a docker image with GNAT SAS installed, and the build artifacts will hold the result of the analysis.
Creating a Docker image for GNAT SAS
NB: GNAT SAS is contained in the package named gnatsas-24.0w-x86_64-linux-bin.tar.gz
First off, in order to create the image we can use the following Dockerfile
FROM ubuntu:18.04 AS build
COPY gnatsas-24.0w-x86_64-linux-bin.tar.gz /tmp/gnatsas/gnatsas-24.0w-x86_64-linux-bin.tar.gz
RUN set -xe \
    	&& cd /tmp \
    	&& mkdir -p gnatsas \
    	&& tar xf /tmp/gnatsas/gnatsas-24.0w-x86_64-linux-bin.tar.gz --strip-components 1 -C gnatsas \
    	&& cd gnatsas \
    	&& ./doinstall /opt/gnatsas \
    	&& cd /opt/gnatsas \
    	&& rm -rf share/doc/ \
	&& rm -rf /tmp/gnatsas

FROM gitlab/gitlab-runner AS run
COPY --from=build /opt/gnatsas /opt/gnatsas
ENV PATH "/opt/gnatsas/bin:${PATH}"
The file starts from the ubuntu:18.04 image, and a GNAT SAS 24.0 installation archive (in our case, for a wavefront version: gnatsas-24.0w-x86_64-linux-bin.tar.gz).
The script then extracts the image, starts an automatic install, removes most docs (parts of it must be kept, though, especially the default MessagePatterns.xml), and cleans up some of the install artifacts.
Then in a second build step, it creates a GitLab runner from this image and sets the environment so that GNAT SAS is in the $PATH.
NB: You may have to start from the gitlab-runner image, as described in: https://docs.gitlab.com/runner/install/docker.html#creating-a-gitlab-runner-docker-image
As you can imagine, this second build step will depend on the infrastructure running your CI. For example, at AdaCore, we are basing our build on a custom-made image that includes some helper scripts, and we set the $PATH through an rc script. However, the main idea is the same regardless of infrastructure.
Publishing the image
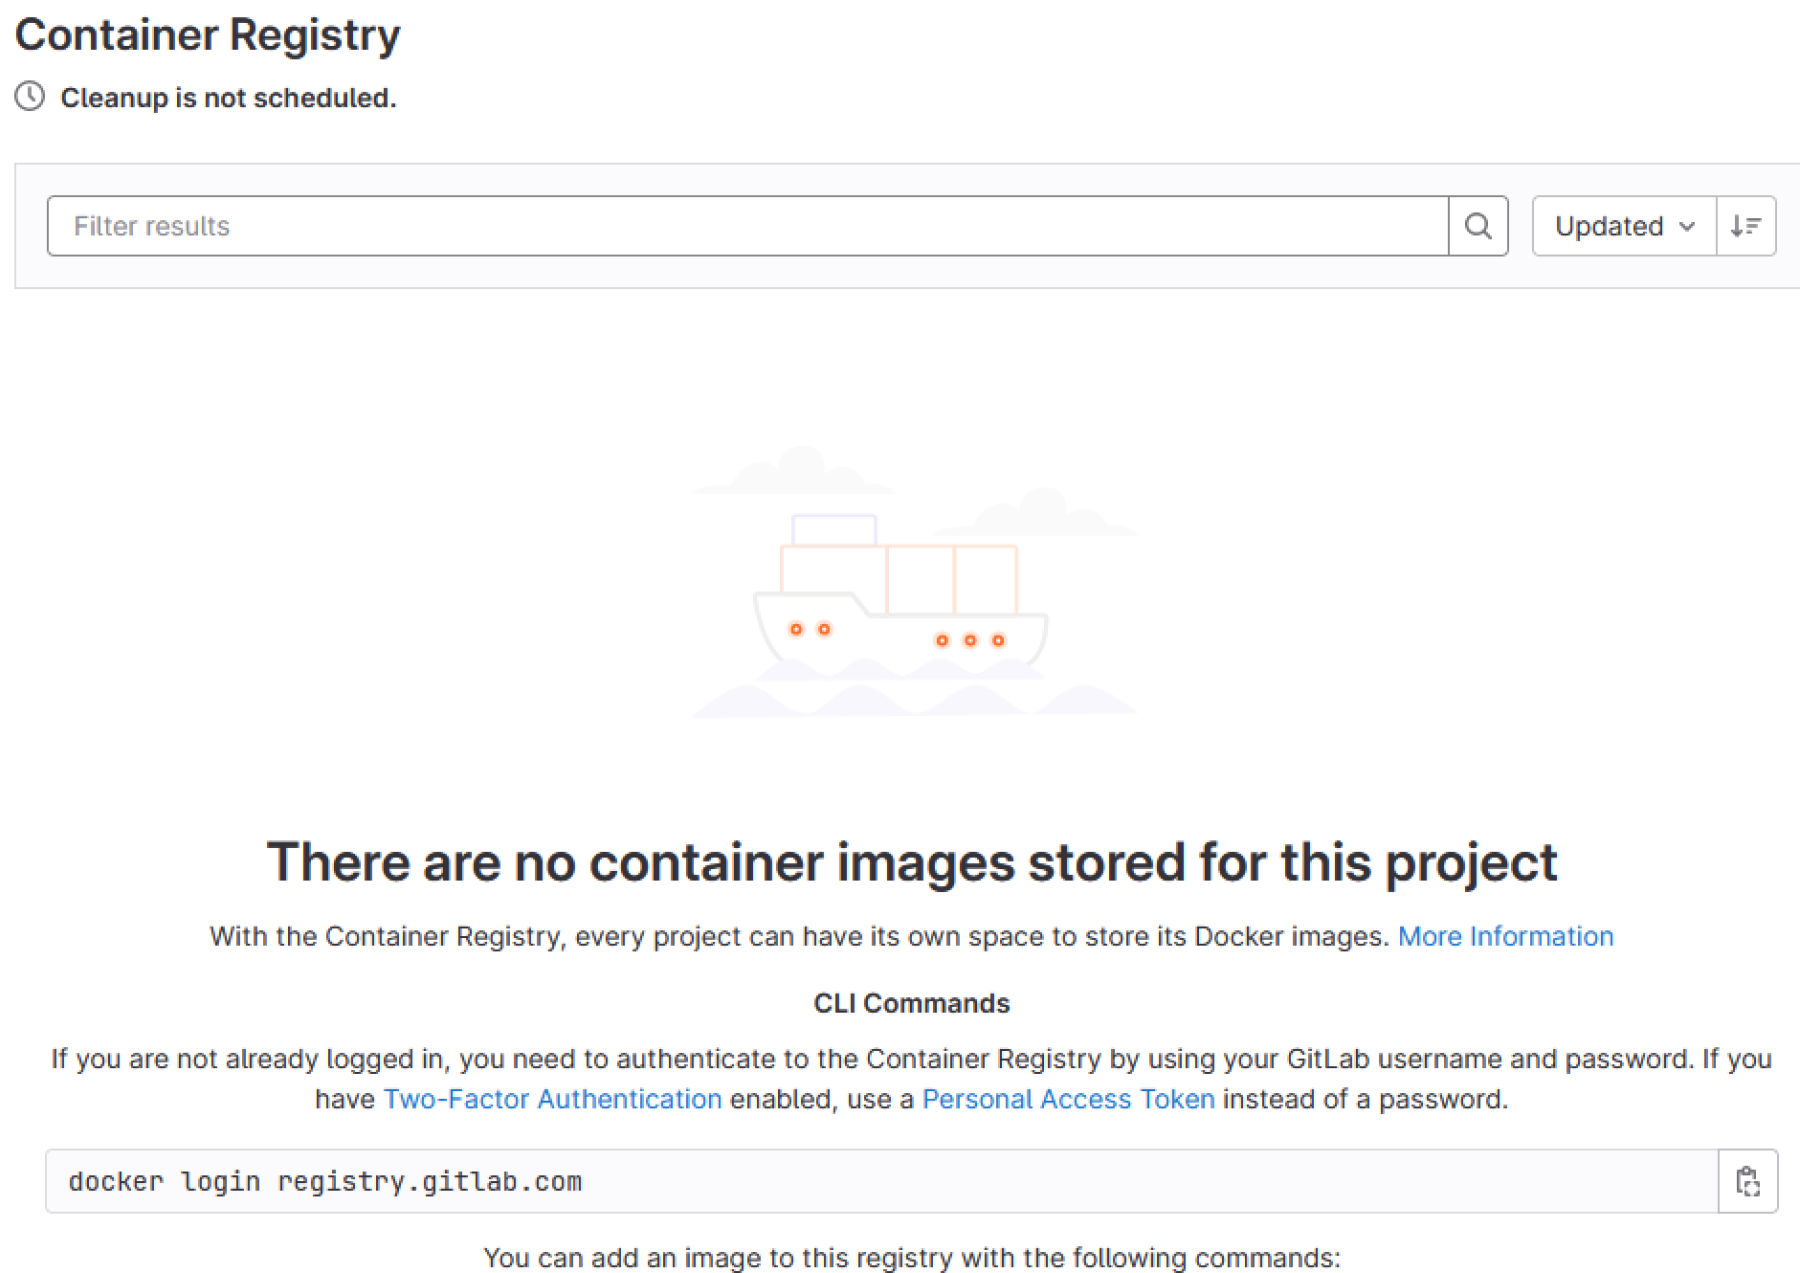
We need to publish our GNAT SAS image to a private Docker container registry. Typically, to use the one which is provided by GitLab, we need to make sure that we have the right to write to it. We then go into our project page and select the "Packages and registries > Container Registry" option, which will open an interface similar to the following.

We are provided with a command to log into the registry, as well as links to create a Personal Access Token, if necessary.
Let’s say we want to push to the registry $REGISTRY_URL. We can then build and tag the image from the Dockerfile, and push it, with the following commands.
$ docker build . -t $REGISTRY_URL/gnatsas:24.0w
$ docker push $REGISTRY_URL/gnatsas:24.0w
NB: Here we are using the image tag version field to store the 24.0w version information, but the Docker image naming convention is pretty free.
Running the image
In order to run the image in the GitLab pipeline, we will need to declare it in our .gitlab-ci.yml file
For example, when using a Kubernetes-based executor, we can use the following configuration file prefix (assuming a GitLab path $PROJECT_PATH for our project)
default:
 image: $REGISTRY_URL/$PROJECT_PATH/gnatsas:24.0w
Then, we can run a simple pipeline script as follows.
default:
  image: $REGISTRY_URL/$PROJECT_PATH/gnatsas:24.0w

GNATSAS:
  script:
      - gnatsas analyze --inspector -P my_project.gpr
	- gnatsas report -P my_project.gpr

  artifacts:
	- paths: gnatsas/
In the CI log, we can see the messages that GNAT SAS emits. We can download the analysis as a CI job artifact, using the menu to the right of the job’s log.

This comes with the caveat that every new CI run may replace the previous artifact, but as a first step, this is acceptable.
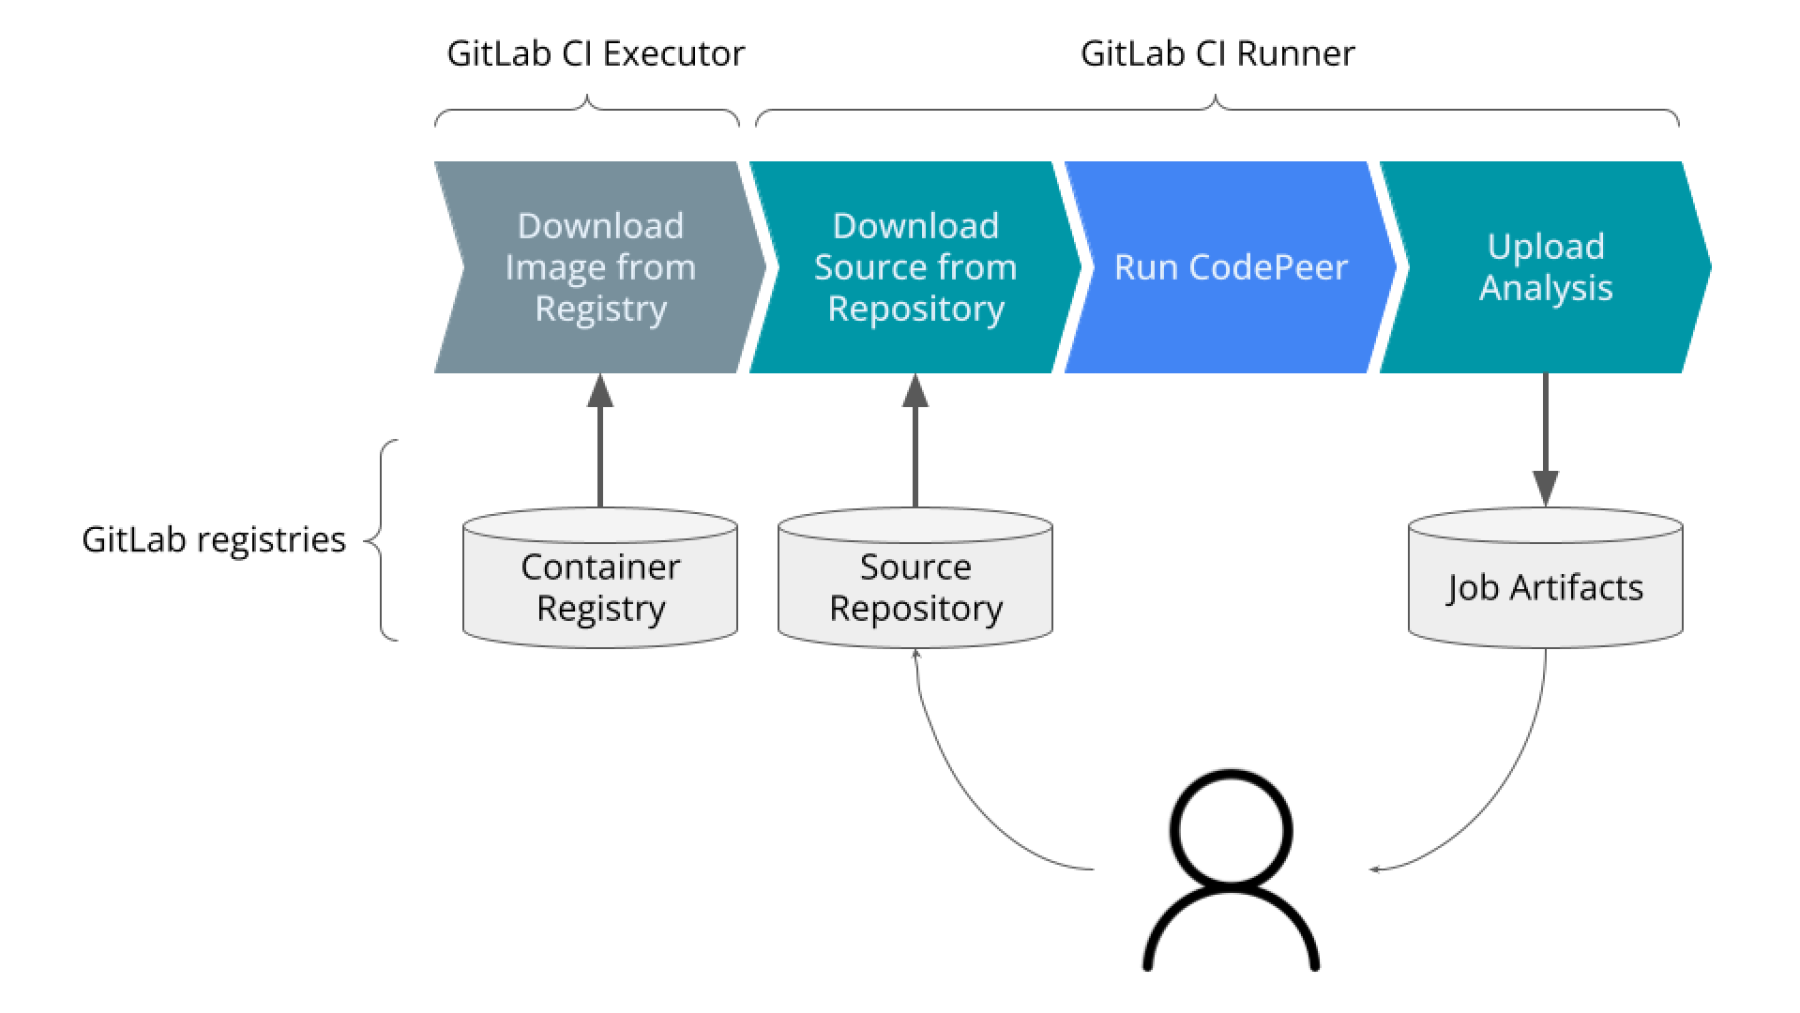
With this, we can now redraw our original diagram with some new details as Figure 4 shows

Analysis result UI
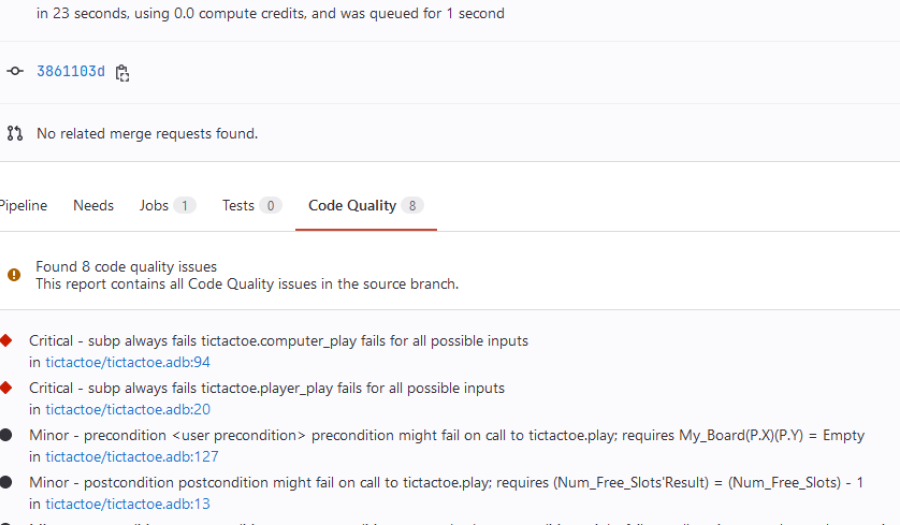
Thanks to GNAT SAS code-climate subcommand, we can also see the GNAT SAS result in the GitLab UI.
First, we need to add a call to GNAT SAS to generate the CodeClimate report, and declare the report's path so that GitLab takes it into account.
default:
  image: $REGISTRY_URL/$PROJECT_PATH/gnatsas:24.0w

GNATSAS:
  script:
	- gnatsas analyze --inspector -P my_project.gpr
      - gnatsas report -P my_project.gpr
	- gnatsas
    	   report
    	   code-climate
    	   -P my_project.gpr
    	   --out $CI_PROJECT_DIR/gnatsas/code_quality_report.json
    	   --root $CI_PROJECT_DIR

  artifacts:
	- paths: gnatsas/
  reports:
	codequality: gnatsas/code_quality_report.json
Now we should see the result in the pipeline's "Code Quality" tab, and clicking on a result will bring us to the source line that caused the warning.
Warning: Due to a GitLab bug, under some conditions (issues of medium severity) the complete “Code Quality” view might fail loading. GNAT SAS 24.1 will implement a workaround for this issue.
Conclusion
That's it! We showed how to build the GNAT SAS image, push it to the repository, use it in our CI pipeline to analyze a project and access the analysis through the GitLab user interface.
The next blog post will focus on scaling this up, by automating the GNAT SAS image build, managing security, and automatically tracking branches in our analyses.

