Train control using Ada on a Raspberry Pi
by Julia Teissl –
I was looking for a topic for my master thesis in embedded systems engineering when one of my advisor proposed the idea of programming a control system for autonomous trains in Ada. Since I am fascinated by the idea of autonomous vehicles I agreed immediately without knowing Ada.
The obligatory "hello world" was written within a few minutes, so nothing could stop me from writing an application for autonomous trains. I was such a fool. The first days of coding were really hard and it felt like writing a Shakespeare sonnet in a language I had never heard but after a few days and a lot of reading in "Ada 2012" by John Barns I recognized the beauty and efficiency of this language.
Half a year had to go by before the first lines of code for my project could be written. First, I had to define requirements and choose which hardware to use. As a start, my advisor suggested Raspberry Pi 3 as implementation platform. Then I had to dive into the world of model trains to develop my first model railway layout.

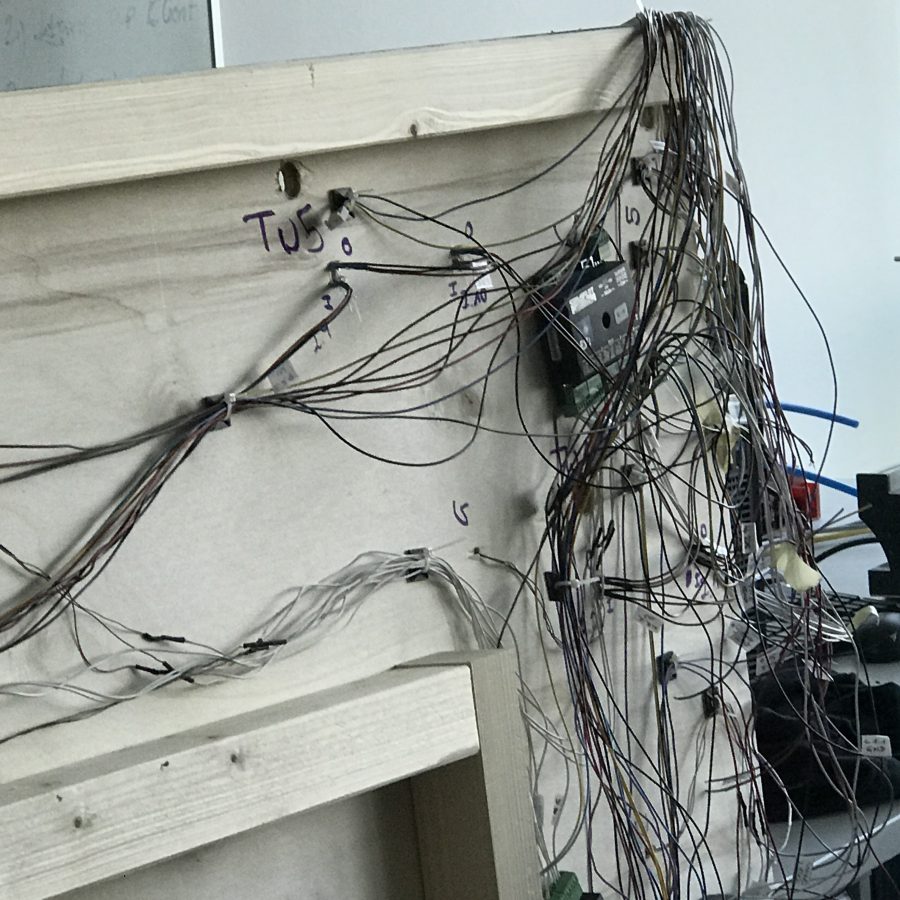
A lot of soldering and wiring was required to build such a simple track (see image below). What a perfect job for a software developer, but as a prospective engineer nothing seemed impossible. It took two months until the whole hardware part was set up. Thanks to my colleagues, electronic engineers, we managed to set up everything as required and stabilized the signals until the interference from the turnout drives was eliminated.
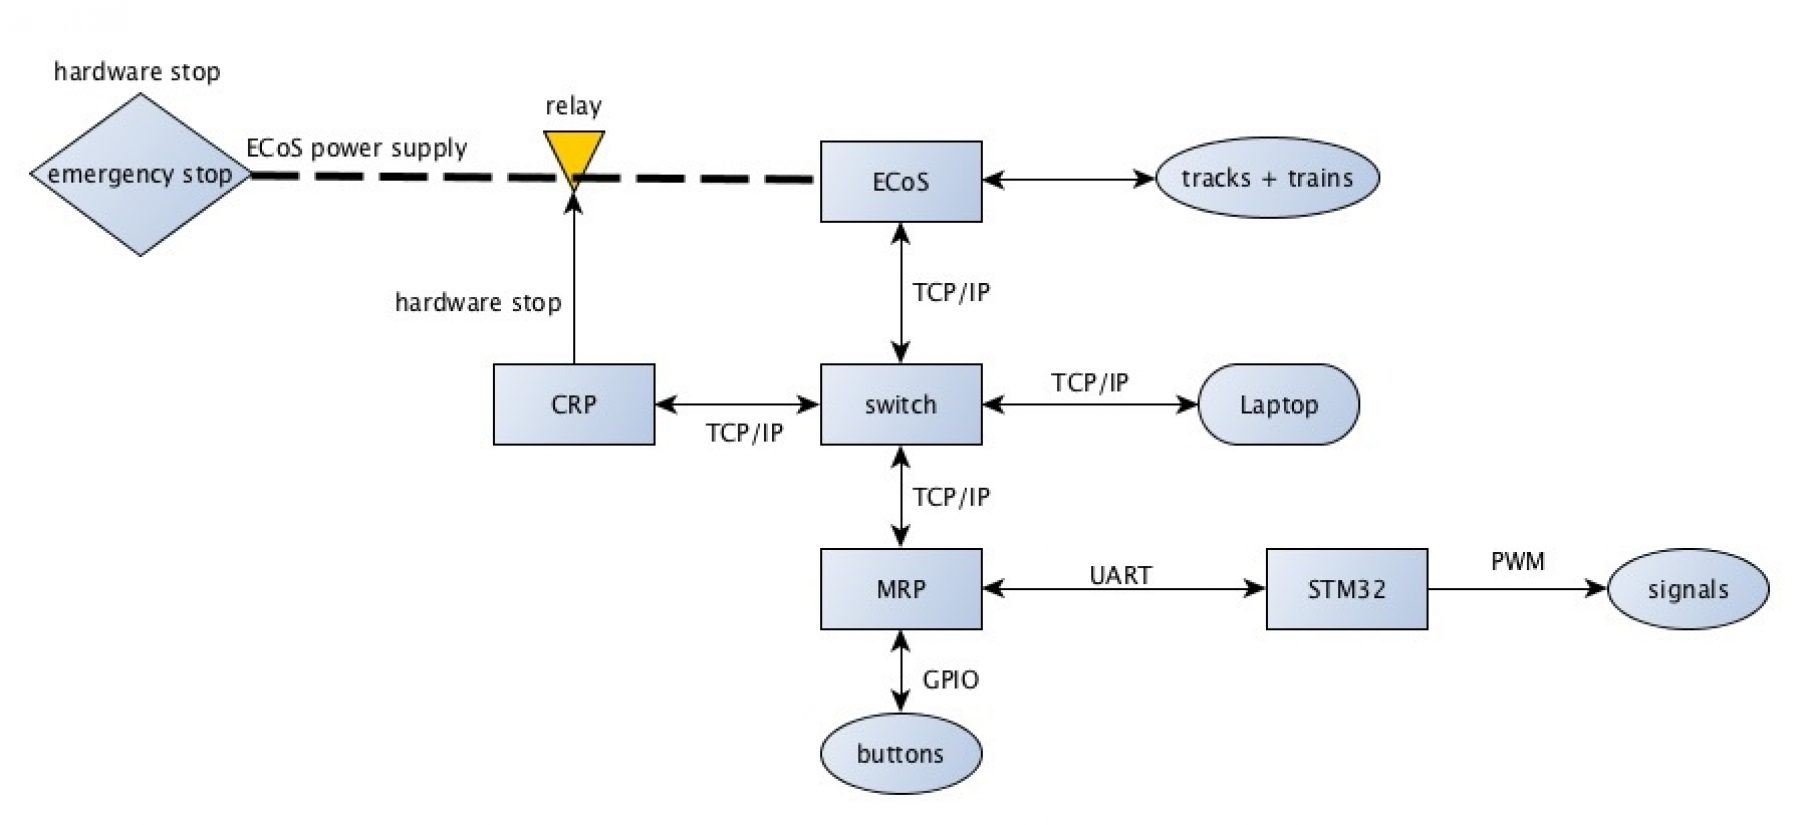
The system architecture (see below) is a bit complicated since a lot of different components had to be taken into account.

To communicate with the trains, turnouts and train position detectors I used an Electronic Solutions Ulm Command Station 50210 (ECoS). It uses the DCC Railcom protocol to communicate with the attached hardware. There are two possibilities to interact with the ECoS -- either an IP interface to send commands or the touchscreen.
The Messaging Raspberry Pi (MRP) receives all messages of the system and continuously polls its interfaces to detect changes for example if a button was pressed to call a train to a specific station. A colleague wrote the software for this part in C#. All messages are converted into a simple format, are transferred to the Control Raspberry Pi and are finally interfaced to the Ada train control software.
A third microcontroller (an STM32F1) triggers the attached LEDs to display if a part of the track can be passed through. The respective commands are sent via UART to the STM32F1. The STM32 software is written in C, but will be rewritten in Ada in the next winter semester by my students during their Ada lessons. If you allow me a side note: I was overwhelmed by the simplicity of Adas multitasking mechanisms, so that I decided to change the content of my safety programming lectures from C and the MISRA C standard to Ada and SPARK, but that is another story.
A goal of my master thesis was to program an on demand autonomous train system. Therefore, trains have to drive autonomously to the different stations, turnouts must be changed, signals must be set and trains must be detected along the track. Each train has its own task storing and processing information: it has to identify its position on the track or the next station to stop at and to offer information like which message it expects next. One main task receives all the messages from the MRP, analyzes them and passes them to the different train tasks. The main part of the software is to handle and analyze all the messages, since each component like the signals or turnouts have their own protocols to adhere to. Thankfully, rendezvous in Ada are very easy to implement so it was fun to write this part of code.
The following video shows a train which is called to a station and drives to a terminus station after stopping at the station and picking up passengers. As the train starts from the middle station, another train has to drive to the middle station. The middle station has to be occupied at all times because waiting times must be kept as short as possible. The signals are not working in this video because I started a new project with a bigger track and already detached most of the parts.


